


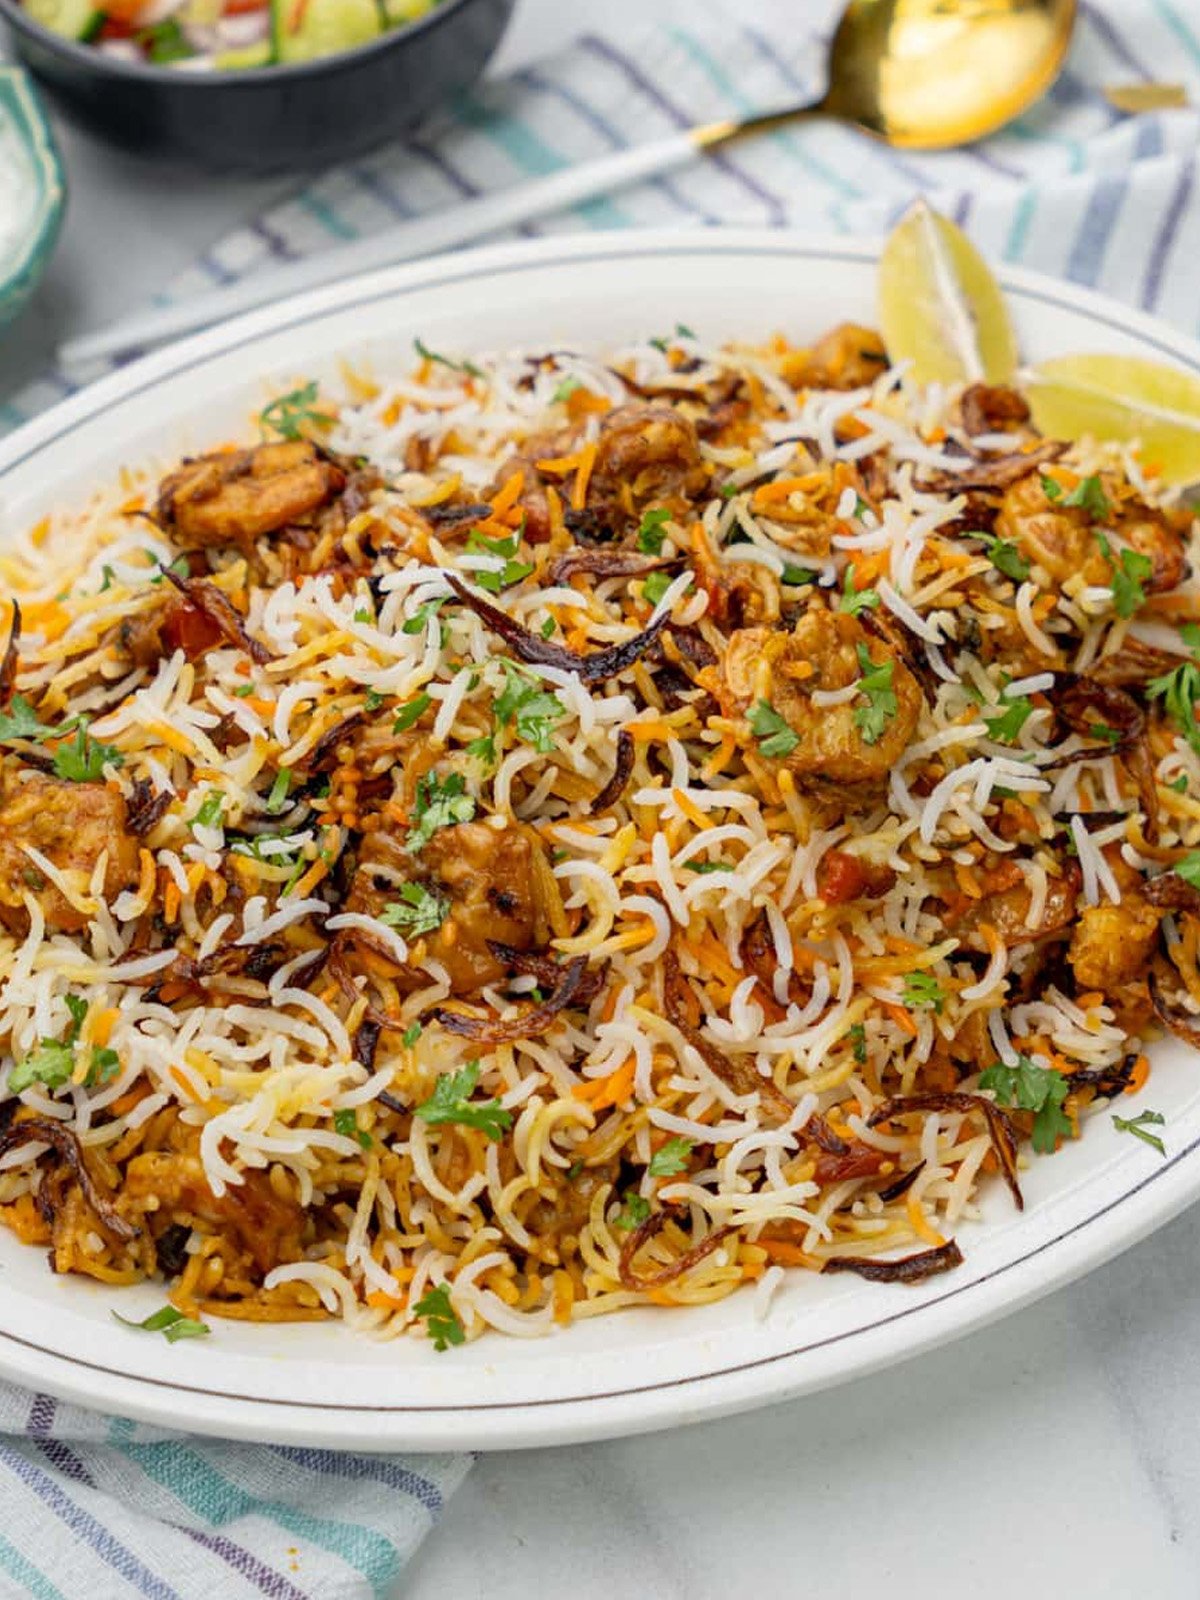
Have you ever tried Prawn Biryani recipe? It’s a flavorful mix of juicy prawns and fragrant rice, cooked with spices that make your mouth water. Especially popular in coastal areas, this dish is perfect for family dinners or celebrations. When the prawns cook with the rice, they soak up all the yummy spices, creating a meal everyone will love!
Jump to:
- About Prawn Biryani
- The Ocean's Delight – Why Prawn Biryani?
- Nutritional Benefits of Prawn Biryani
- What You'll Need to Make This Prawns Biryani?
- How to Make Prawn Biryani
- Flavor Variations and Customizations
- Prawn Biryani Pairing Suggestions
- Tips & Tricks for Perfect Prawn Biryani
- Tips for Making Prawn Biryani in a Pressure Cooker or Instant Pot
- ❔FAQs
About Prawn Biryani
The Prawn Biryani has deep roots in Mughal influence, where royal chefs blended rich spices and seafood, creating the flavorful dish we enjoy today.
Dum cooking, a slow cooking method, traps the aroma and enhances the prawn’s natural flavor.
In terms of regional variations:
- Hyderabadi Prawn Biryani is spicy and layered with fried onions, basmati rice, and a rich marinade.
- Kolkata Prawn Biryani features mild spices, boiled eggs, and potatoes for a comforting taste.
- Mangalore & Kerala Prawn Biryani uses coconut milk and a touch of tamarind, giving it a tropical twist.
Prawn Biryani is also a celebratory dish, often served during weddings and festivals, especially in coastal regions, marking its significance in joyful occasions.
Therefore, this prawn biryani recipe is more than just food—it's a celebration of culture and tradition!
The Ocean's Delight – Why Prawn Biryani?
Firstly, Prawn Biryani recipe is a coastal delight, especially from regions like Kerala, Goa, Kolkata, and Mangalore, where seafood is a staple.
Not only is it a tribute to the sea, but it's also lighter than regular biryani recipe because of the delicate taste of prawns.
Furthermore, prawns bring a subtle sweetness, perfectly balancing the spicy, fragrant rice. In essence, this biryani is a fusion of rich and refreshing flavors.
So, whether you’re a seafood lover or just trying something new, Prawn Biryani recipe is sure to impress!
Nutritional Benefits of Prawn Biryani
- Rich in Protein: Prawns are packed with protein, making this biryani an excellent choice for those looking for a lean protein boost.
- Low-Carb Option: Moreover, if you're on a low-carb diet, Prawn Biryani can be a perfect choice when paired with a fresh raita or a light salad.
- Omega-3 Fatty Acids: Additionally, prawns are a fantastic source of heart-healthy omega-3 fatty acids, promoting overall heart health.
- Fiber from Rice & Vegetables: Finally, the fiber from rice and veggies aids in digestion and supports gut health.
Craving more deliciousness? Check out these mouthwatering recipes:
Vegetable Biryani
Egg Biryani
Mutton Biryani
Mushroom Biryani
Moong Dal
Get cooking and enjoy!
What You'll Need to Make This Prawns Biryani?
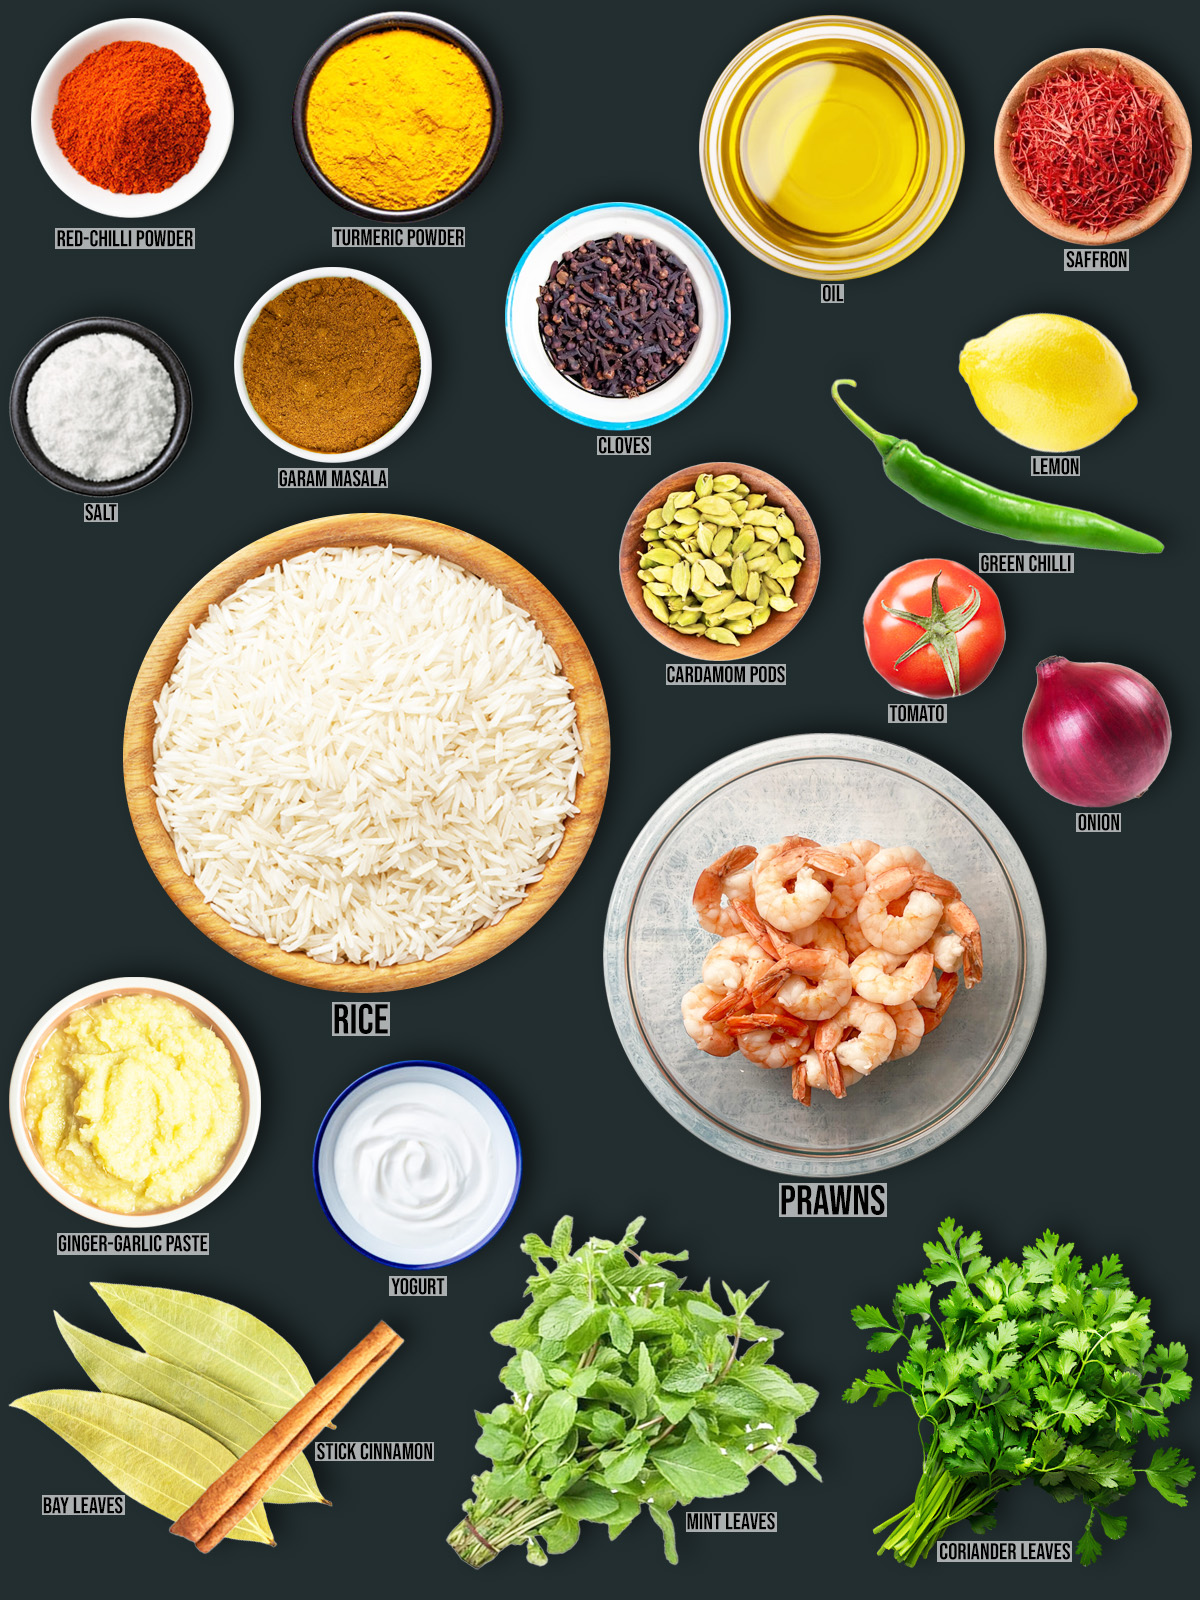
Ingredients for Prawn Biryani
- Prawns (300g): Fresh, juicy prawns are the star! The sweetness of prawns perfectly balances the spices.
- Basmati Rice (1 cup): Long-grain basmati rice, fragrant and fluffy, holds the spices and prawns beautifully.
- Onions (2, thinly sliced): Fried onions add that crispy crunch and deep flavor. Pro Tip: Frying them just right is key—golden brown, not burnt!
- Tomatoes (2, chopped): Juicy tomatoes give a mild tanginess that balances the rich spices. They’re like the unsung hero of the biryani.
- Yogurt (2 tbsp): A creamy marinade for the prawns. It tenderizes the prawns and adds richness. Did you know? Yogurt makes the biryani super soft and fragrant.
- Spices (bay leaves, cinnamon, cloves, cardamom): These aromatic spices are essential for that "biryani smell" we all love.
- Ginger-garlic paste (1 tbsp): Adds that kick! It’s the heart of any good biryani, giving it that bold, zesty flavor.
- Coriander & Mint Leaves (a handful): Fresh herbs bring in a burst of color and freshness. I always throw in a few extra mint leaves for that refreshing after taste!
- Lemon (1, juiced): A splash of tang to brighten the dish. This is the zesty twist that takes Prawn Biryani from good to great.
- Coconut Milk (optional, ¼ cup): In Kerala-style biryani, coconut milk makes it richer and adds a tropical twist.
Check Out the Full Ingredients & Quantities in the Recipe Card Below!

How to Make Prawn Biryani
Step by Step Instructions
1. Marinating the Prawns:
- First, marinate the prawns for 30 minutes to 1 hour. This is important because it lets the prawns soak up all the flavors!
2. Preparing the Rice:
- Next, cook the rice by par boiling or layering it directly with the prawns. Remember, don’t overcook the rice—it should be fluffy, not mushy!
3. Cooking the Prawns:
- Then, sauté the prawns briefly. They cook fast, so add them to the partially cooked rice to keep them tender, not tough!
4. Layering the Biryani:
- After that, start with a layer of rice, followed by prawns, and top it off with more rice. This layering ensures all the flavors mix perfectly!
5. Dum Cooking:
- Now, seal the pot with dough or a tight lid, then cook on low heat. This step traps the steam and lets the flavors blend together beautifully.
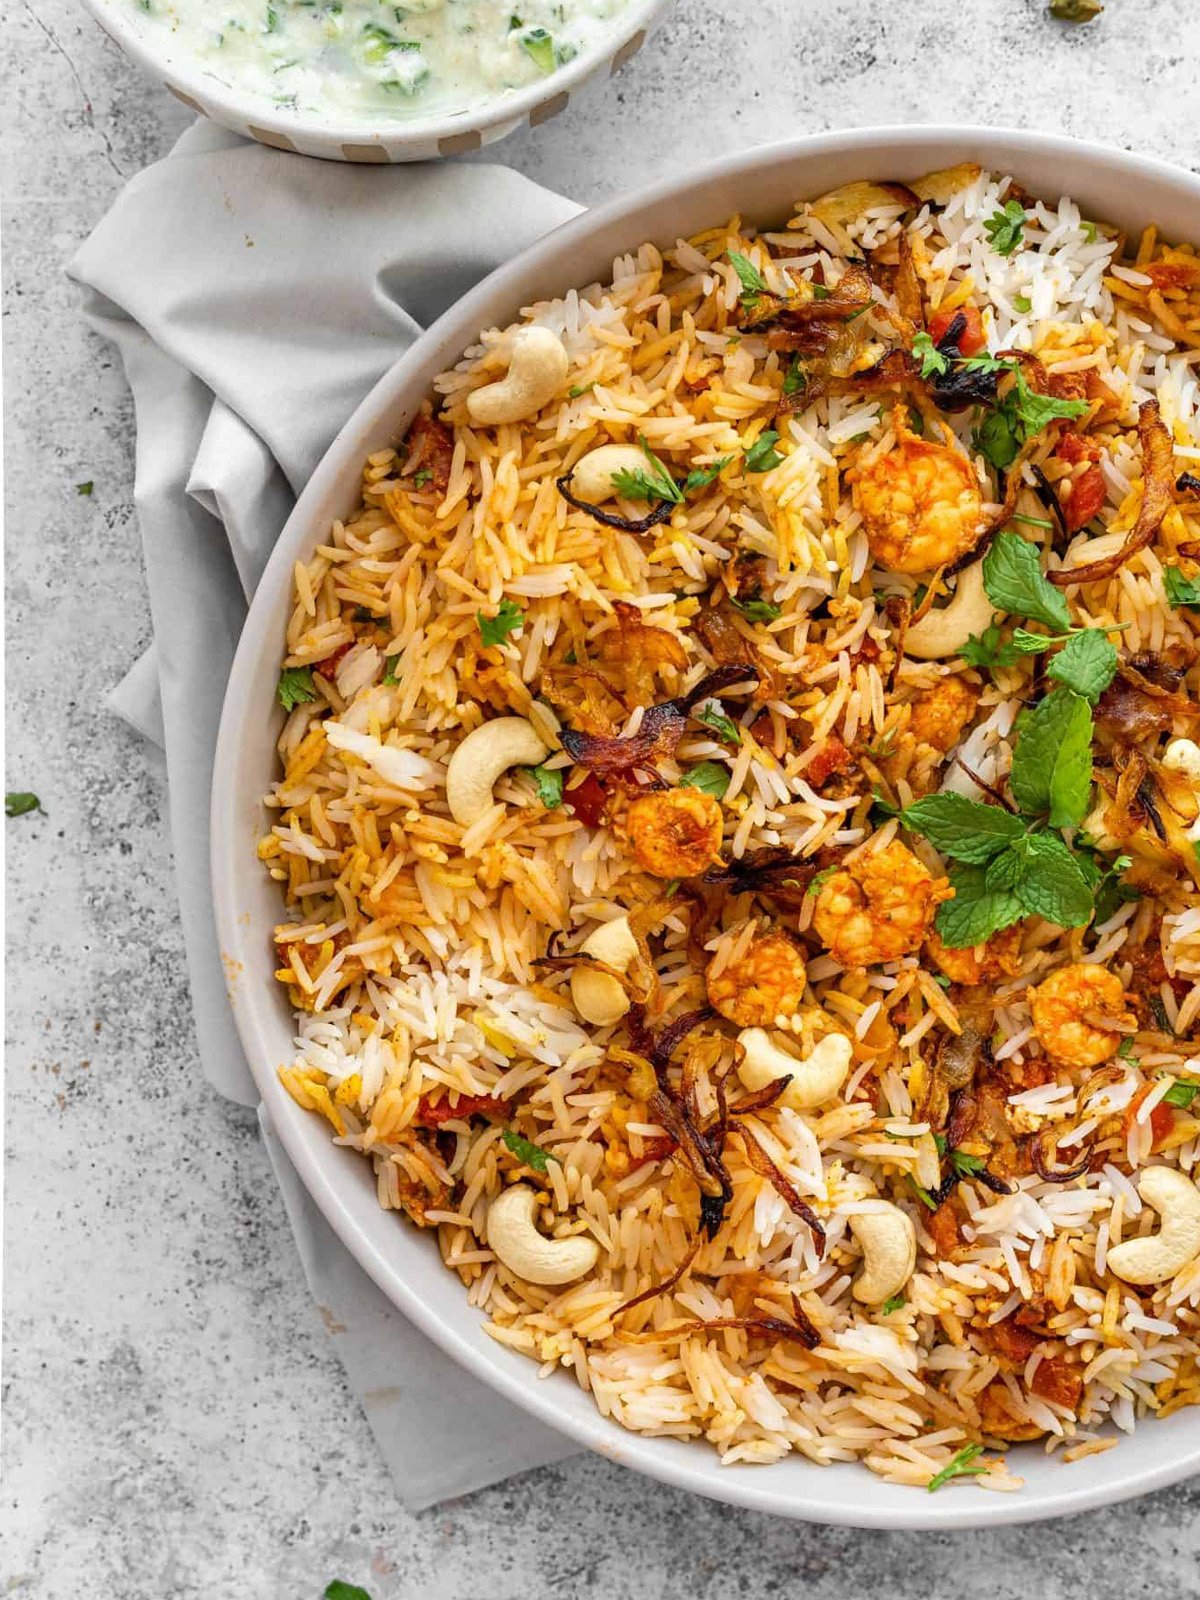
6. Final Garnish:
- Lastly, add some mint, fried onions, and raita on the side. These final touches add texture and extra yum!
- Cooking Technique
- Stovetop Method:
- First, heat oil in a pan and sauté the spices. Then, add the rice and water, and cook on low heat. This method allows the rice to absorb the flavors slowly, making it aromatic and tasty.
- Pressure Cooking Method:
- On the other hand, if you're in a hurry, you can use a pressure cooker. Simply sauté the spices and add the rice and water. Seal the cooker, cook for 2 whistles, and voilà—you get a faster, equally flavorful biryani!
- Dum Cooking (Slow Cooking):
- Lastly, for the most traditional approach, use Dum cooking. Start by layering the rice and prawns, seal the pot, and cook on very low heat. This slow cooking method helps the flavors blend and ensures tender prawns and perfectly cooked rice.
Flavor Variations and Customizations
1. Smoked Prawn Biryani: Lastly, for a unique twist, use the dhungar method. Place a burning coal on top of the biryani before sealing the pot for that rich, smoky aroma. A truly aromatic experience!
2. Spicy Prawn Biryani: If you’re a fan of heat, add extra green chilies or a dash of red chili paste to bring in a fiery kick. It’ll surely satisfy your spice cravings!
3. Coconut and Tamarind Infused Biryani: On the other hand, if you love tropical flavors, add coconut milk and a little tamarind paste. This gives the biryani a tangy-sweet balance—perfect for Kerala-style biryani!
4. Vegetable Prawn Biryani: Another key point is mixing in vegetables like peas, carrots, and potatoes. This not only adds texture but also makes it a hearty, one-pot meal!
Prawn Biryani Pairing Suggestions
- Raita: First thing to remember, to balance the spice and richness of the biryani, pair it with a cooling raita. For example, boondi raita or onion-cucumber raita will provide the perfect contrast. Alternatively, a mint raita gives a refreshing twist!
- Salads: Additionally, pair your biryani with a crisp, fresh salad. Kachumber (tomato, cucumber, onion) is a popular option, or you could go for a mint-coriander salad for a tangy, refreshing bite that complements the biryani beautifully.
- Pickles: What’s more, for a spicy-sour kick, try adding mango pickle or lime pickle. These will cut through the richness of the biryani, making each bite even more exciting!
- Papadums: Finally, for that extra crunch, serve the biryani with crispy papad or poppadoms. It’s the perfect way to add texture and a delightful crunch!
Tips & Tricks for Perfect Prawn Biryani
1. Balancing Spices: To clarify, balancing the spices is key! Add some tang by using lemon juice or yogurt, and sweetness from coconut or fried onions. This balance will give you a well-rounded, flavorful biryani that isn’t too spicy or too sweet.
2. Avoid Overcooking the Prawns: First thing to remember, prawns cook quickly and can become tough if overcooked. To avoid this, add them last and cook them just until they turn pink and tender. This will keep them juicy and flavorful. As a result, your biryani will have perfectly cooked prawns!
3. Rice Cooking Secrets: Moreover, to keep your rice separate and fluffy, parboil the rice (cook it about 70-80% before layering) or use a rice cooker. This prevents it from becoming soggy, ensuring that each grain stays light and airy.
4. Marination Time: Furthermore, don't marinate the prawns for more than an hour. As I have noted, longer marination can cause prawns to become too soft and lose their texture. Thus, aim for 30 to 60 minutes to get the best balance of flavor and tenderness.
Tips for Making Prawn Biryani in a Pressure Cooker or Instant Pot
Pressure Cooker Method:
- Firstly, layer the rice and marinated prawns in the pressure cooker.
- Then, add water (about 1.5 cups for every cup of rice).
- After that, cook on low heat for about 5 minutes to ensure the prawns don’t overcook.
- Consequently, you’ll get perfectly tender prawns and fluffy rice.
- In short, avoid high heat to keep the prawns juicy!
Instant Pot Version:
- To begin with, layer the rice, prawns, and spices in the Instant Pot.
- Secondly, use the "Sealing" function and set to "Manual" for 4-5 minutes.
- Moreover, ensure you use the correct water ratio—usually 1:1.5 rice-to-water ratio.
- In addition, set to low pressure to prevent mushy rice.
- All things considered, this method saves time while giving you that rich biryani flavor!
Did you try this Prawn Biryani recipe? Leave a ⭐️⭐️⭐️⭐️⭐️ rating below and share it on Instagram, Facebook, and Pinterest!

❔FAQs
To avoid mushy rice, do not overcook the rice during the initial boiling stage. Cook it until it's 70% done, as it will continue to cook during the dum process. Also, handle the rice gently while layering.
Yes, you can prepare Prawn Biryani ahead of time. Cook it fully and let it cool before storing it in an airtight container in the refrigerator. Reheat gently before serving to maintain its flavor and texture.
Yes, Prawn Biryani can be frozen for up to 2 months. Allow it to cool completely before transferring it to a freezer-safe container. Thaw it in the refrigerator overnight before reheating.
If your biryani is too spicy, you can balance the heat by adding a dollop of yogurt or a squeeze of lemon juice. Serving it with a side of raita or cooling cucumber salad can also help mitigate the spice levels.

Prawn Biryani
Ingredients
For the Marinade:
- 500 gram Prawns, peeled and deveined
- 1 Cup Plain yogurt
- 2 tablespoon Ginger-garlic paste
- 1 teaspoon Turmeric powder
- 1 teaspoon Red chili powder
- 1 teaspoon Garam masala
- Salt to taste
For the Rice:
- 2 Cup Basmati rice
- 4 Cup Water
- 2-3 Bay leaves
- 4-5 Cloves
- 2-3 Green cardamom pods
- 1 Small stick cinnamon
- Salt to taste
For the Biryani:
- 2 tablespoon Ghee or oil
- 2 Large onions, thinly sliced
- 2 Tomatoes, chopped
- 2 Green chilies, slit
- 1 tablespoon Ginger-garlic paste
- 1 teaspoon Turmeric powder
- 1 teaspoon Red chili powder
- 1 teaspoon Biryani masala
- 1 teaspoon Garam masala
- 1 Cup Fresh coriander leaves, chopped
- 1 Cup Fresh mint leaves, chopped
- ¼ Cup Chopped fresh cilantro
- ¼ Cup Milk with saffron strands (optional)
- 1 tablespoon Lemon juice
For Garnishing:
- Fried onions (optional)
- Fresh coriander and mint leaves
Instructions
Marinating the Prawns:
- First, marinate the prawns for 30 minutes to 1 hour. This is important because it lets the prawns soak up all the flavors!
Preparing the Rice:
- Next, cook the rice by parboiling or layering it directly with the prawns. Remember, don’t overcook the rice—it should be fluffy, not mushy! 🍚✨
Cooking the Prawns:
- Then, sauté the prawns briefly. They cook fast, so add them to the partially cooked rice to keep them tender, not tough!
Layering the Biryani:
- After that, start with a layer of rice, followed by prawns, and top it off with more rice. This layering ensures all the flavors mix perfectly!
Dum Cooking:
- Now, seal the pot with dough or a tight lid, then cook on low heat. This step traps the steam and lets the flavors blend together beautifully.
Final Garnish:
- Lastly, add some mint, fried onions, and raita on the side. These final touches add texture and extra yum!

Leave a Reply