


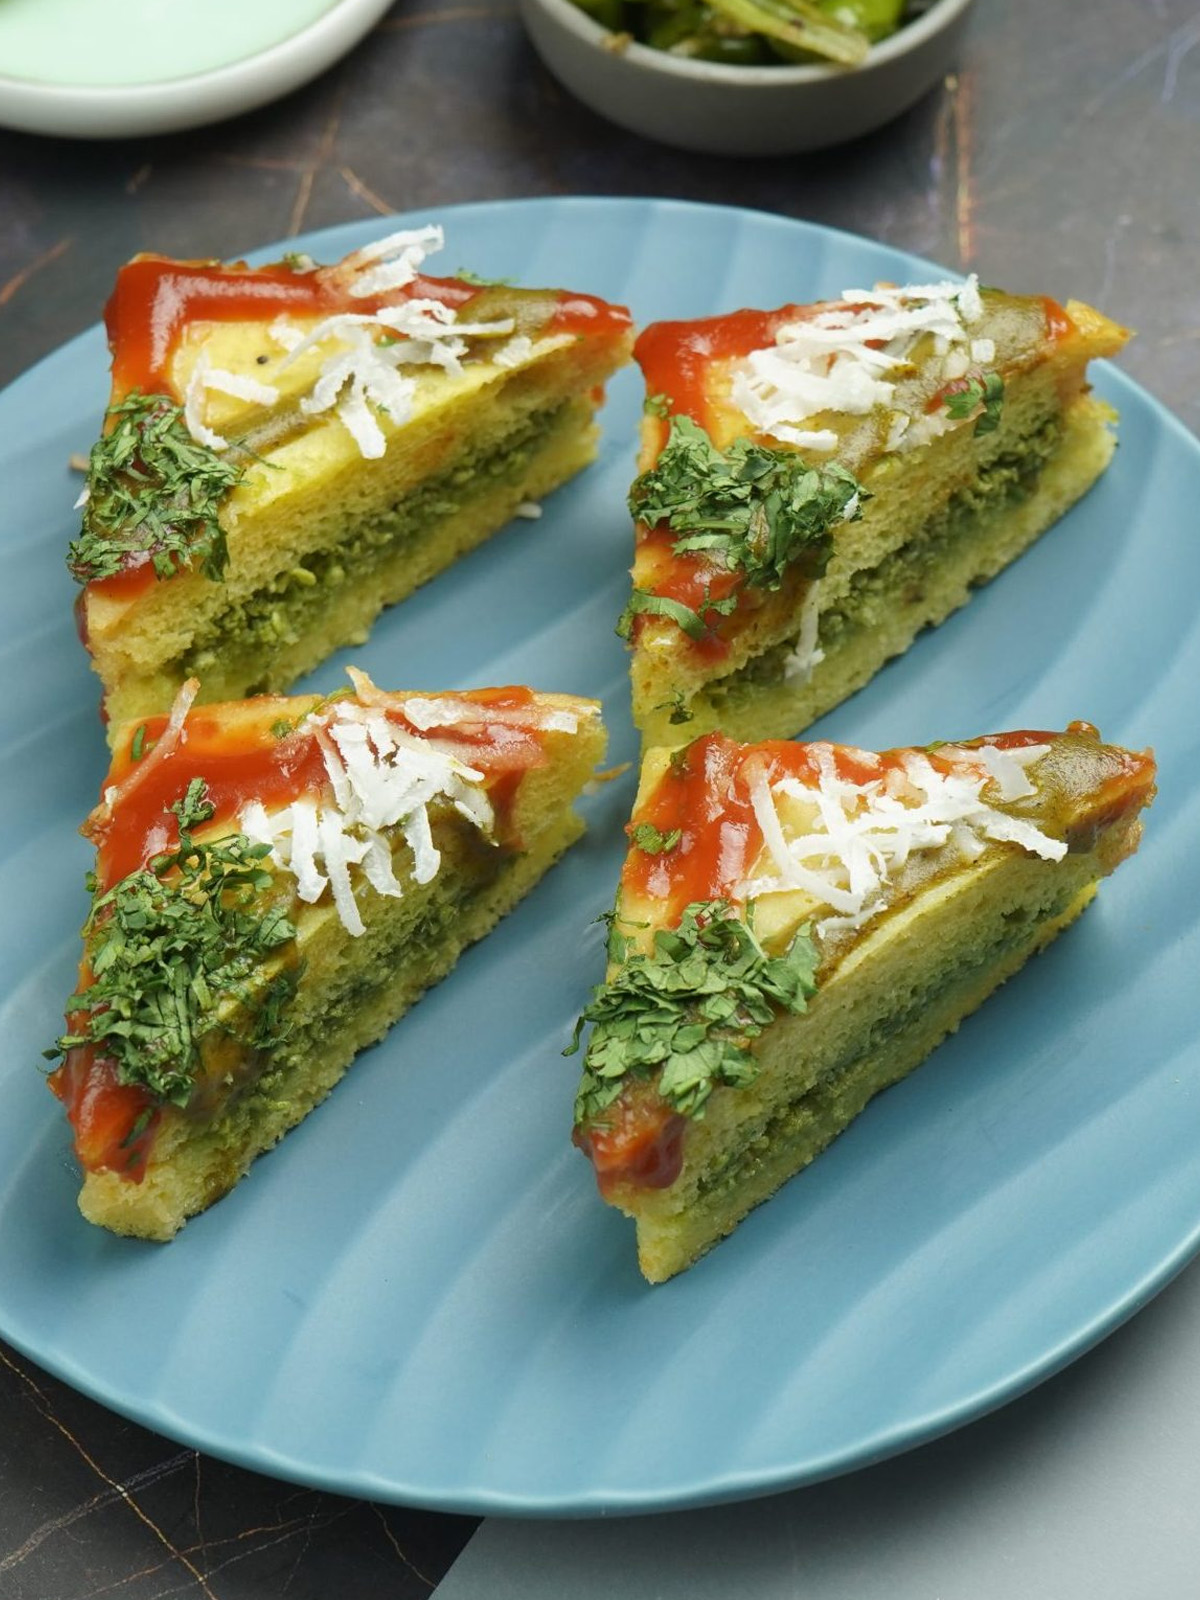
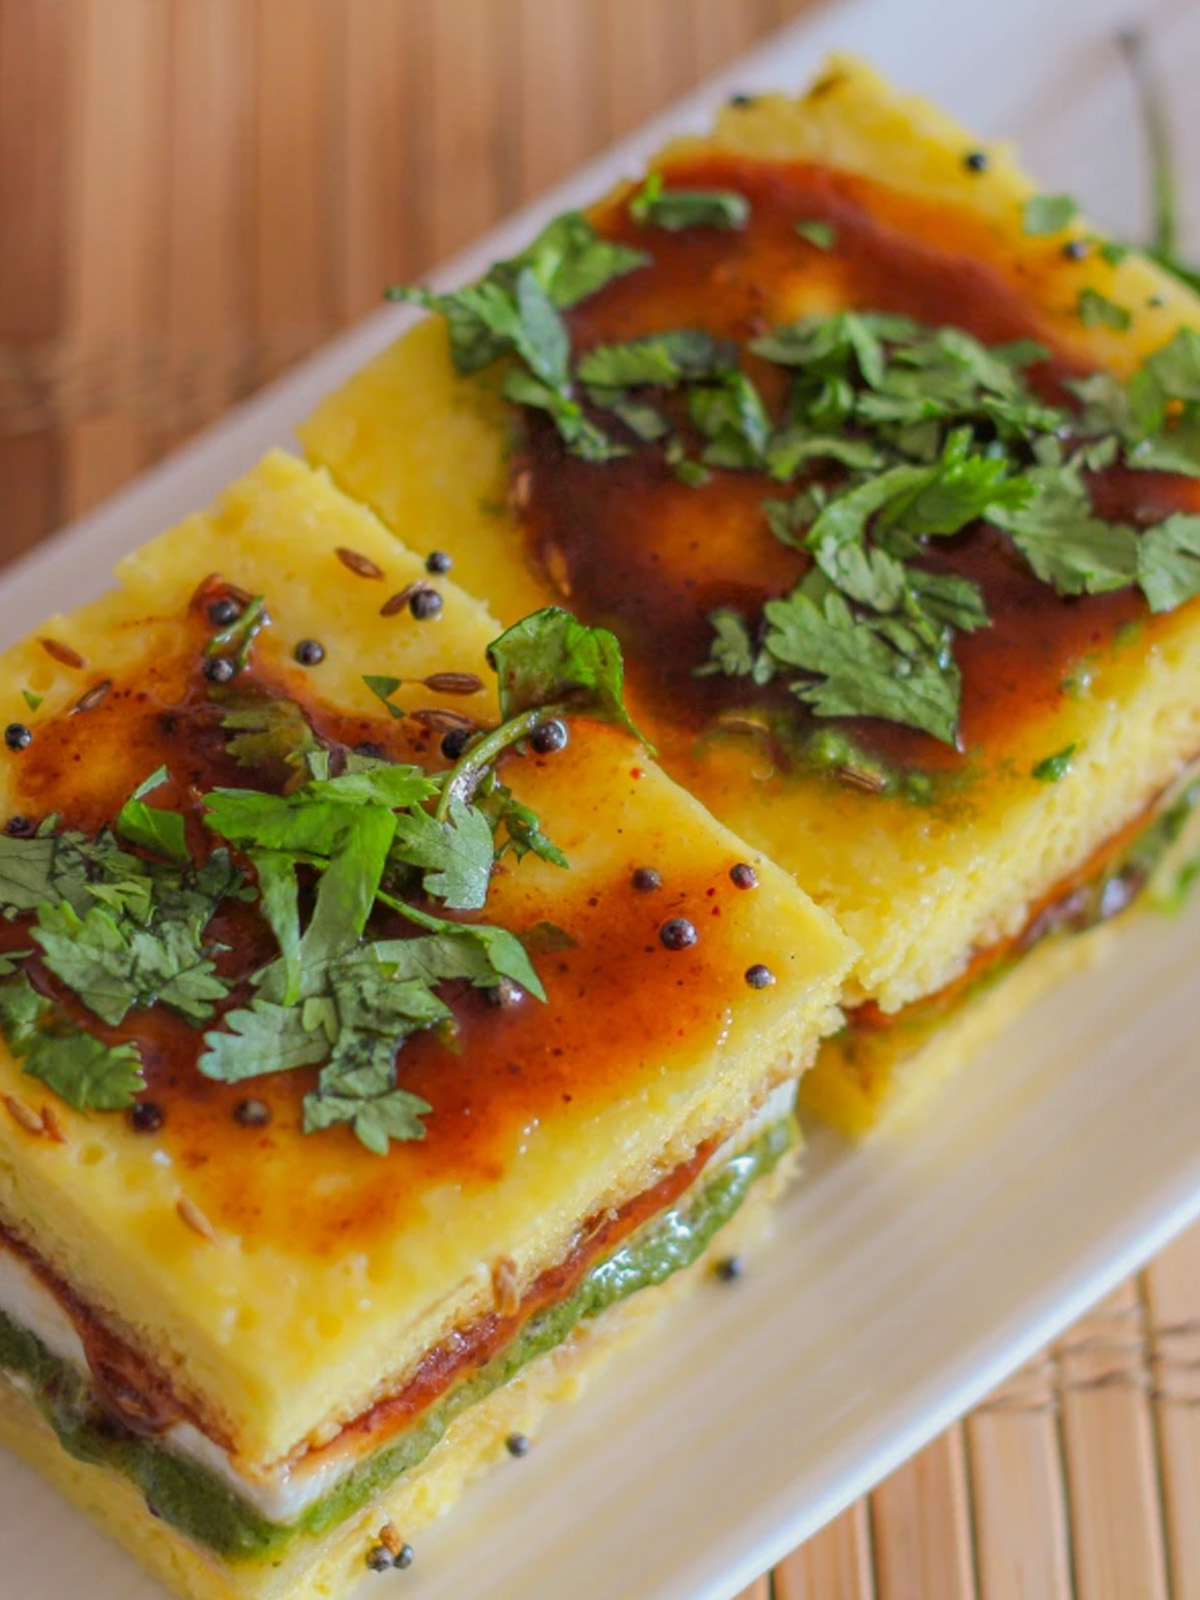
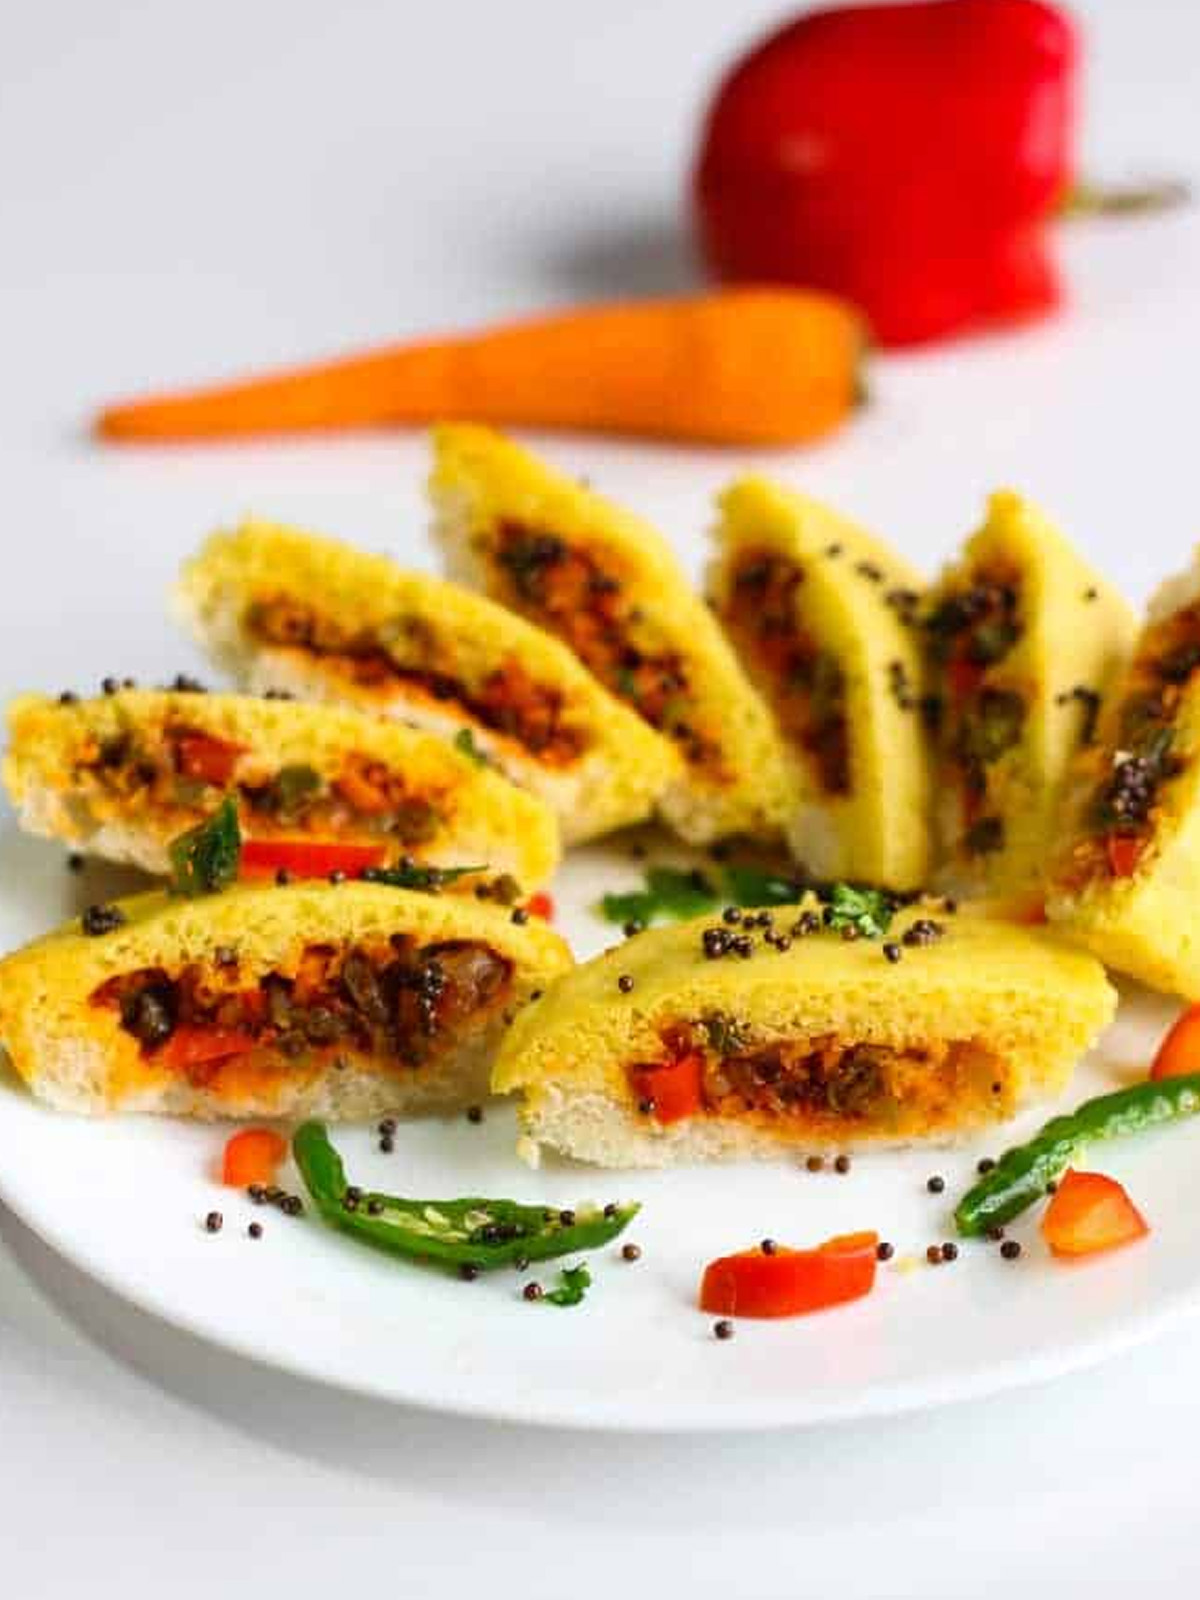
A Dhokla Sandwich is a fun twist on the classic steamed dhokla from Gujarat. It blends the soft, fluffy texture of dhokla with fresh fillings, creating a tasty and exciting snack! I remember trying this for the first time at a family gathering, and everyone loved it. This fusion keeps the traditional flavors alive while adding a modern touch! Try this Dhokla Sandwich Recipe for a delightful and unique snack experience!
Jump to:
About Sandwich Dhokla
Dhokla has been a beloved part of Indian cuisine for years, often served at festivals and celebrations to symbolize happiness. Moreover, its soft, spongy texture and delicious taste make it a favorite among people of all ages, bringing joy to every gathering.
The dhokla sandwich recipe adds a fun, modern twist while keeping the tradition alive. In my family, dhokla was always made by my grandmother on Saturdays, and now, I make it for my friends to share our tradition.
Why Dhokla Sandwich?
The Dhokla Sandwich recipe is a perfect fusion of soft, fluffy dhokla and crunchy, fresh fillings. As a result, it offers a unique twist on the traditional dhokla, combining the best of both worlds! It's an exciting way to enjoy a classic dish with a fun, modern twist.
It’s great for breakfast, a quick snack, or even a light meal. I love how the softness of the dhokla pairs so well with the crunchiness of the veggies! It’s a fun, tasty treat!
Why is this Gujarati Sandwich Dhokla Popular?
The Gujarati sandwich dhokla recipe is a fun twist on the classic version! Unlike regular dhokla, which is soft and steamed, this one adds layers of spicy chutneys and fresh veggies.
It’s super customizable, so you can add cheese or more toppings for a tasty snack. Plus, it’s easy to prepare and looks super colorful, making it perfect for any occasion!
Health Benefits of Dhokla?
- Light and Healthy: Dhokla is steamed, so it's a light and low-calorie snack —a great alternative to fried snacks, perfect for those wanting a healthy and filling treat!
- Nutritional Benefits: It's packed with protein from chickpea flour, low in fat, and full of fiber. Moreover, it’s super easy to digest, making it perfect for sensitive stomachs. Therefore, it’s not only delicious but also a healthy choice for everyone!
- Vegan & Gluten-Free: Additionally, you can make dhokla vegan and gluten-free, which makes it perfect for a variety of dietary needs! This way, everyone can enjoy it, no matter their preferences or restrictions!
What you Need to Make This Dhokla Sandwich?
Recipe Ingredients:
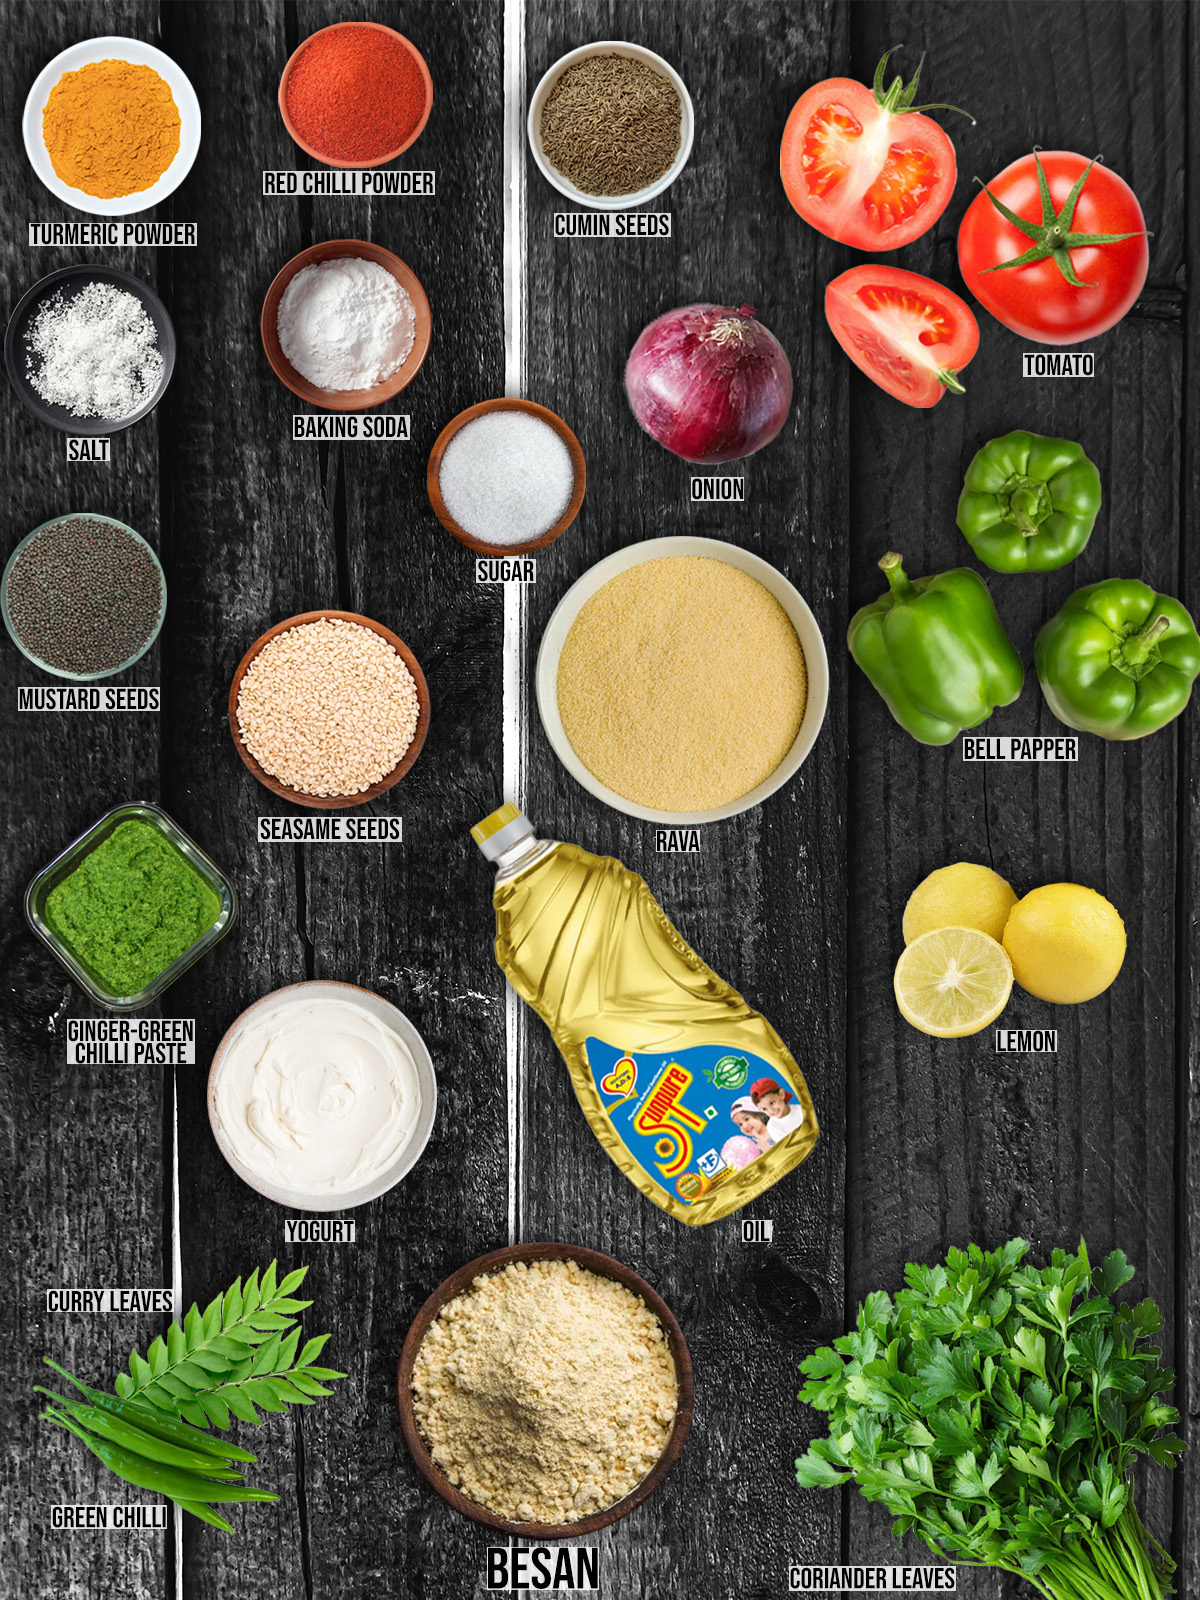
Ingredients Notes:
- Dhokla: The base of the sandwich is soft, spongy, and delicious! I still remember how my grandma would make it every weekend. The aroma would fill the entire house, and we’d eagerly wait for it to be ready! It was always such a special moment.
- Chutneys: Whether it’s tangy tamarind or spicy green chutney, it adds that extra zing! I’ve always loved spreading it on my dhokla as a kid—it just made every bite so much more exciting!
- Fresh Veggies: Crisp cucumber and juicy tomato slices bring a delightful crunch and freshness to the sandwich. With every bite, it’s like a little crunchy surprise that makes the dhokla sandwich even more delicious!
- Cheese: Optional, but it makes the sandwich even more irresistible! Sometimes I add a cheesy layer, and my friends can’t get enough of it.
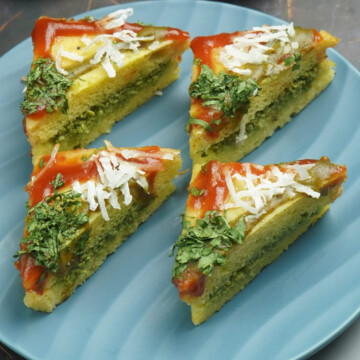
- Coriander Leaves: A sprinkle of fresh coriander adds a burst of color and freshness. Not only does it make the sandwich look beautiful, but it also enhances the flavor, making each bite even more delicious!
Craving something new? Dive into these yummy treats:
- Cheese Chutney Sandwich – A cheesy delight with a spicy kick!
- Vegetable Handvo – Savory, spiced, and packed with veggies!
- Paneer Bread Roll – Crispy outside, cheesy goodness inside!
- Sweet Potato Chaat – Sweet, spicy, and absolutely irresistible!
- Vegetable Biryani – A fragrant rice dish with all the veggies you love!
How to Make Sandwich Dhokla?
Step by Step Instructions
1. Making the Dhokla
- Start by mixing the besan, yogurt, turmeric powder, and salt in a bowl. Add enough water to make a smooth batter. It should be thick but pourable.
- Just before you’re ready to steam, add Eno or baking soda to the batter and mix gently. This will make the dhokla fluffy.
- Pour the batter into a greased plate or steamer tray. Steam it for about 15-20 minutes. To check if it’s done, insert a toothpick—if it comes out clean, the dhokla is ready!
2. Cooling and Slicing
- After steaming, let the dhokla cool for a few minutes.
- Once it has cooled, simply grab a knife and slice it into squares or rectangles. These pieces will serve as the soft, spongy "bread" for your delicious sandwich.
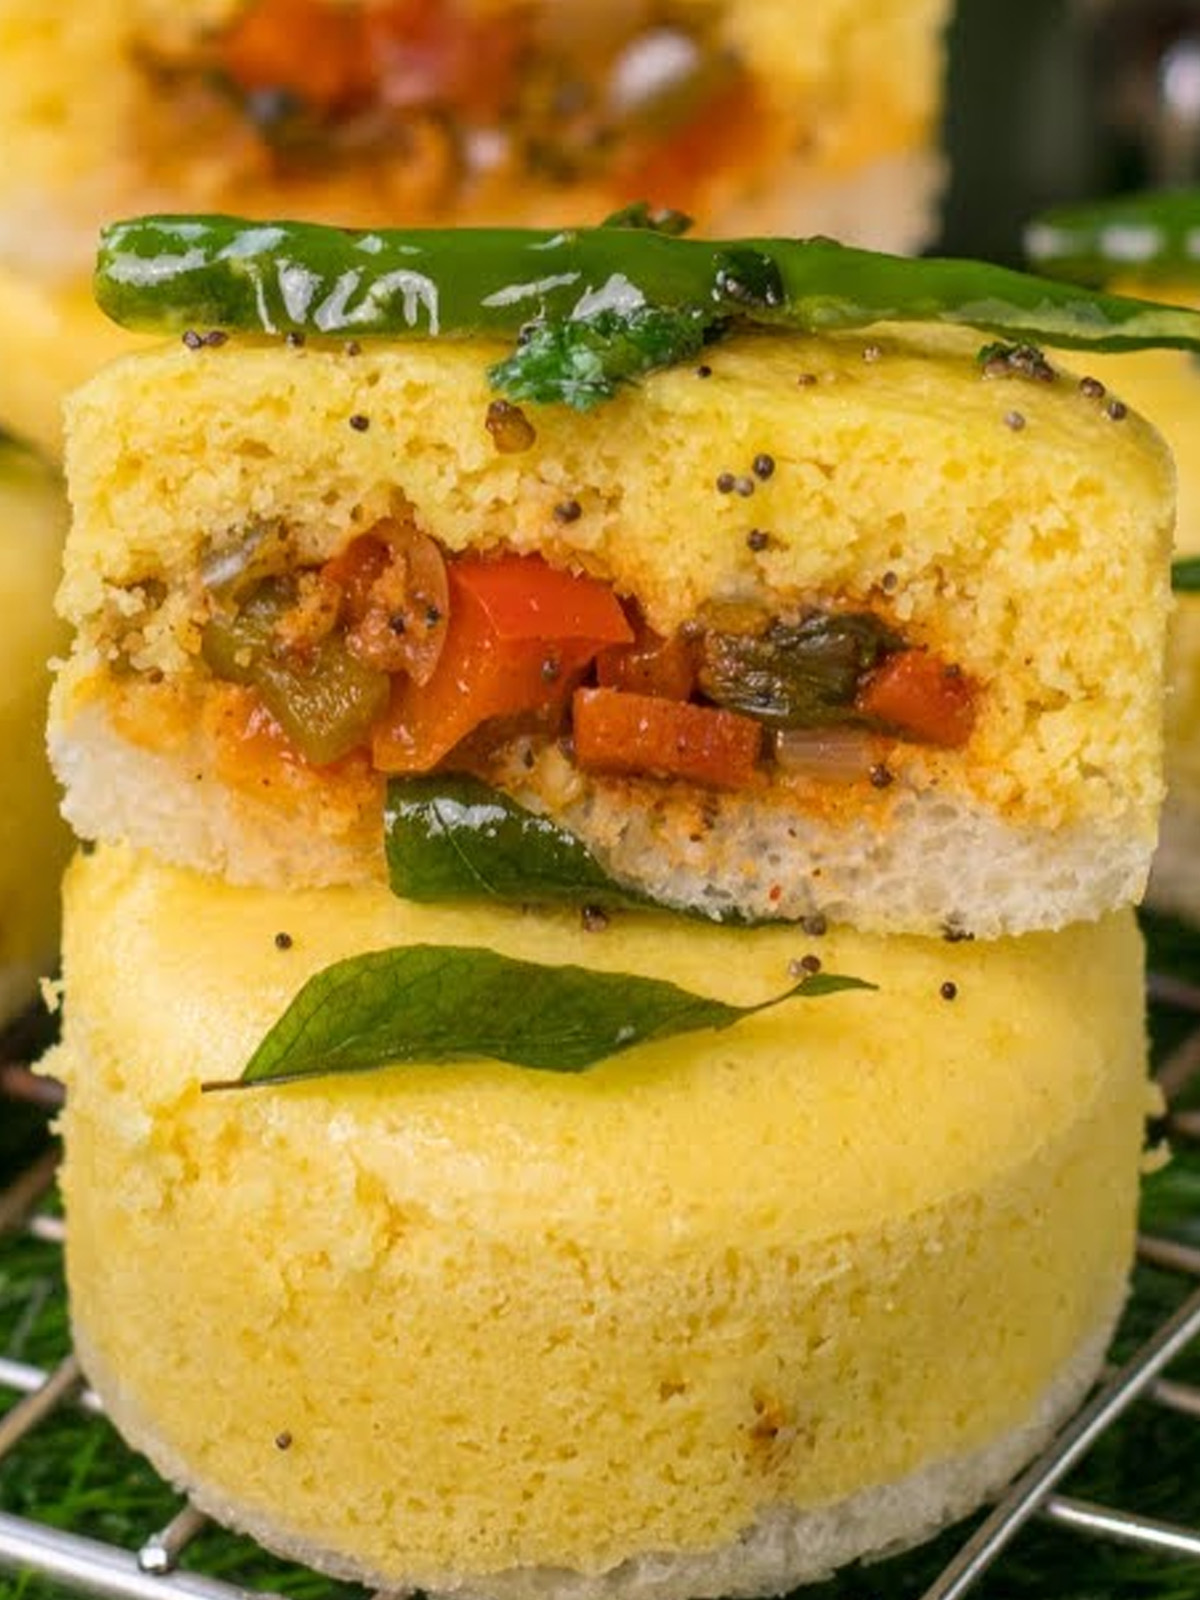
3. Assembling the Sandwich
- First, take one piece of dhokla as the base. Then, spread a generous layer of green chutney on top, which adds a refreshing burst of flavor! This simple step really takes your sandwich to the next level!
- Place cucumber, tomato, and bell pepper slices on the chutney. If you like cheese, add a slice now.
- Spread some sweet tamarind chutney over the vegetables. Place another piece of dhokla on top to complete your sandwich.
- Next, sprinkle some fresh coriander and mint leaves on top for an extra burst of flavor and freshness. This will elevate your sandwich, making it even more delicious and vibrant!
Serving Suggestions
- Pairing with Drinks: For the perfect pairing, you can enjoy your Dhokla Sandwich with a hot cup of masala chai, a zesty fresh lemonade, or a cool lassi. Additionally, for something extra refreshing, try a cucumber or mint cooler to create a light and cooling combo that’s simply delightful!
- Side Dishes: To make the meal even better, you can pair it with a simple salad, crunchy roasted chickpeas, or delicious spiced potato wedges. These additions bring extra flavor and crunch, making your meal even more satisfying and enjoyable!
- Plating Ideas: Want it to look fancy? Simply arrange the sandwich on a nice platter and add colorful chutneys or fresh herbs around the sides. This gives it a fun, tasty touch that not only looks amazing but also enhances the flavor!
Flavor Variations
1. Chutney Varieties: Get creative with chutneys! For a fresh twist, try mint chutney, coriander chutney, or tangy tamarind chutney. If you prefer some heat, add spicy garlic chutney for a burst of bold flavor. Each chutney brings its own unique taste to the sandwich!
2. Vegetarian Additions: To make your sandwich even more colorful and tasty, add fresh veggies! Consider grilled zucchini, peppers, and mushrooms, or raw veggies like carrots, tomatoes, and lettuce for extra crunch.
3. Cheese Options: For a cheesy delight, try cheddar, mozzarella, or even paneer. If you want a vegan version, go for vegan cheese or tofu slices!
4. Spice Variations: Spice things up! You can adjust the green chilies to your liking, sprinkle some red chili powder for extra heat, or toss in pickled vegetables for a tangy zing. These additions will take your sandwich to the next level!
Storage Tips
- Leftover Sandwich Dhokla: If you have leftovers, store them in an airtight container in the fridge. They'll stay fresh for 1-2 days, so you can enjoy them later!
- Reheating: To bring back that crispy texture, reheat your dhokla sandwich in the oven or on a tawa. If you want to make it extra crispy, try using an air fryer!
- Freezing Option: Want to keep it longer? Freeze your dhokla sandwiches for up to a month. Just make sure to wrap them tightly so they stay fresh!
- Dough Storage: If you make extra dough, store it in the fridge for up to 24 hours. It'll be ready for your next sandwich round!
Did you try this Sandwich Dhokla recipe? Leave a ⭐️⭐️⭐️⭐️⭐️ rating below and share it on Instagram, Facebook, and Pinterest!
❔FAQs
Key ingredients for Sandwich Dhokla include gram flour (besan), curd (yogurt), semolina, spices (such as turmeric and chili powder), and a filling made from vegetables like onions and tomatoes. Tempting toppings like mustard seeds, sesame seeds, and curry leaves add flavor.
Yes, you can prepare Sandwich Dhokla ahead of time. Store it in an airtight container in the refrigerator and reheat it gently before serving to maintain its texture and flavor.
To add more spice to your Sandwich Dhokla, increase the amount of green chili paste or red chili powder in the batter and filling. You can also add finely chopped green chilies to the tempering for an extra kick.
Yes, Sandwich Dhokla is typically gluten-free as it uses gram flour (besan) and does not contain wheat or other gluten-containing ingredients. However, always check all ingredient labels to ensure they meet gluten-free standards.
Yes, you can make Sandwich Dhokla without semolina. If you omit semolina, adjust the batter consistency with a little extra gram flour or water as needed. The texture may be slightly different but still delicious.
Dhokla Sandwich Recipe
Ingredients
Ingredients
For the Dhokla Batter:
- 1 Cup Besan (gram flour)
- ½ Cup Curd (yogurt)
- ½ Cup Water (adjust as needed)
- ¼ Cup Semolina (rava)
- 1 tablespoon Ginger-green chili paste
- 1 teaspoon Baking soda
- 1 tablespoon Lemon juice
- 1 teaspoon Turmeric powder
- 1 teaspoon Sugar
- Salt to taste
For the Filling:
- ½ Cup Finely chopped onions
- ½ Cup Finely chopped tomatoes
- ¼ Cup Finely chopped green bell pepper
- 1 tablespoon Oil
- 1 teaspoon Mustard seeds
- ½ teaspoon Cumin seeds
- ½ teaspoon Turmeric powder
- ½ teaspoon Red chili powder
- Salt to taste
- Fresh coriander leaves, chopped
For Tempering:
- 2 tablespoon Oil
- 1 teaspoon Mustard seeds
- 1 teaspoon Sesame seeds
- A few curry leaves
- 1-2 Green chilies, slit (optional)
- 1 tablespoon Lemon juice
- Fresh coriander leaves for garnish
Instructions
Making the Dhokla
- Start by mixing the besan, yogurt, turmeric powder, and salt in a bowl. Add enough water to make a smooth batter. It should be thick but pourable.
- Just before you’re ready to steam, add Eno or baking soda to the batter and mix gently. This will make the dhokla fluffy.
- Pour the batter into a greased plate or steamer tray. Steam it for about 15-20 minutes. To check if it’s done, insert a toothpick—if it comes out clean, the dhokla is ready!
Cooling and Slicing
- After steaming, let the dhokla cool for a few minutes.
- Once it has cooled, simply grab a knife and slice it into squares or rectangles. These pieces will serve as the soft, spongy "bread" for your delicious sandwich.
Assembling the Sandwich
- First, take one piece of dhokla as the base. Then, spread a generous layer of green chutney on top, which adds a refreshing burst of flavor! This simple step really takes your sandwich to the next level!
- Place cucumber, tomato, and bell pepper slices on the chutney. If you like cheese, add a slice now.
- Spread some sweet tamarind chutney over the vegetables. Place another piece of dhokla on top to complete your sandwich.
- Next, sprinkle some fresh coriander and mint leaves on top for an extra burst of flavor and freshness. This will elevate your sandwich, making it even more delicious and vibrant!
Notes
Flavor Variations
1. Chutney Varieties: Get creative with chutneys! For a fresh twist, try mint chutney, coriander chutney, or tangy tamarind chutney. If you prefer some heat, add spicy garlic chutney for a burst of bold flavor. Each chutney brings its own unique taste to the sandwich! 2. Vegetarian Additions: To make your sandwich even more colorful and tasty, add fresh veggies! Consider grilled zucchini, peppers, and mushrooms, or raw veggies like carrots, tomatoes, and lettuce for extra crunch. 3. Cheese Options: For a cheesy delight, try cheddar, mozzarella, or even paneer. If you want a vegan version, go for vegan cheese or tofu slices! 4. Spice Variations: Spice things up! You can adjust the green chilies to your liking, sprinkle some red chili powder for extra heat, or toss in pickled vegetables for a tangy zing. These additions will take your sandwich to the next level!Storage Tips
-
- Leftover Sandwich Dhokla: If you have leftovers, store them in an airtight container in the fridge. They'll stay fresh for 1-2 days, so you can enjoy them later!
-
- Reheating: To bring back that crispy texture, reheat your dhokla sandwich in the oven or on a tawa. If you want to make it extra crispy, try using an air fryer!
-
- Freezing Option: Want to keep it longer? Freeze your dhokla sandwiches for up to a month. Just make sure to wrap them tightly so they stay fresh!
-
- Dough Storage: If you make extra dough, store it in the fridge for up to 24 hours. It'll be ready for your next sandwich round!

Leave a Reply